Sample Project
Map Graph contains a sample project with a bunch of examples. Installing it is easy. It's recommended to install the sample project in a blank project that uses the Built-In Render Pipeline.
Please make sure you use the default 3D template when installing the sample project.
Map Graph is developed using its minimum required Unity version, and thus the Rule Tile assets are created using version 1.x of the 2D Tilemap Extras package, whereas the 2D template of newer versions of Unity uses version 2.x. Assets created using version 1.x are not compatible with version 2.x. So this will cause errors.
After you install Map Graph from the Asset Store, the following window should pop up. (If it doesn't, you can find it under Tools/Map Graph):
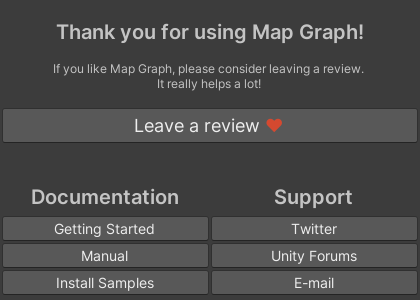
Simply click Install samples to install the sample project.
Once installation is complete, you'll find a scene called Samples (and the other sample assets) in the Assets/Samples folder.
Installing the sample project manually
If the sample project installer is giving you problems, you can try installing the sample project manually.
Install the dependencies
First make sure the sample project's dependencies are installed:
- Open up the "Packages/manifest.json" file in your favorite text editor.
- Check if the following packages are listed:
- com.unity.2d.tilemap@1.0.0
- com.unity.2d.tilemap.extras@1.5.0-preview
- com.unity.2d.pixel-perfect@2.0.4
- If any of these packages are missing, add them.
Unity should now automatically install the missing packages.
Install the sample project
Now that the dependencies are installed, you can import the sample project package:
- Select "Assets/Import Package/Custom Package...".
- Select the "Samples.unitypackage" file located in the "Assets/Plugins/InsaneScatterbrain/MapGraph.Samples" folder.
The sample project should now be installed!
If you're still running into any issues, please reach out through any of the channels described in the support section.
Credits
The following assets are used in the sample project:
- Cartography Pack made by Kenney
- Dungeon Tileset made by Buch
- Particle Pack made by Kenney
- Overworld Tileset made by ArMM1998
- Planet and Stars Set made by Rawdanitsu
- Basic Hex Tile Set Plus made by pistachio (Original made by drjamgo)
- Racing Pack made by Kenney
- Roguelike/RPG pack made by Kenney
- Platformer Kit made by Kenney
- Sci-Fi RTS made by Kenney
- Pixel Platformer made by Kenney
Special thanks to the creators of these assets! ❤